Empty Walls? No Please!
Who even likes blank, simple colored walls? You can paint your walls with different colors but even those do not help; you will feel that there’s something lacking. Having decorations or ornaments just enhances the beauty of your interior. One of the best ways to beautify your space is added pictures.
We think that nothing can be a more epitome of perfection than pictures. Pictures aren’t just images in the form of paper. No, they are memories, signifying the most amazing and memorable moments of your life. They’re the moments that you deemed precious enough that you just had to capture them and display for everyone to see. Pictures are your happy moments that elevate your moods.
One look at them and you can start smiling even during the most hectic and tiring of the days.
Alas, decorating your space is not as easy as it might sound. Most of you may have a lot of creative ideas but aren’t as good at turning their thoughts to come alive. Some of you might even hesitate to decorate- even though they want to- just because they don’t like buying manufactured décor.
Some of you might even be too lazy or clueless about where to start. This all even though their minds may be in reality, filled with desires to make your walls look more aesthetic and what not.
In another scenario, you finally are ready to take action and plan on placing pictures, but then, what about the photo frames? What kind do you use? Are there any cheaper frames or creative alternatives and DIYs through which you can fill your area with pictures?
If you’re stuck in a similar situation, don’t fret. This article is just for you. We shall guide you on how you can turn your most memorable pictures into the ideal interior décor tools. One way you can do this is to make your own wall tiles!
Vote for Photos as Your No. 1 Asset for Wall Decor? Yes Please!
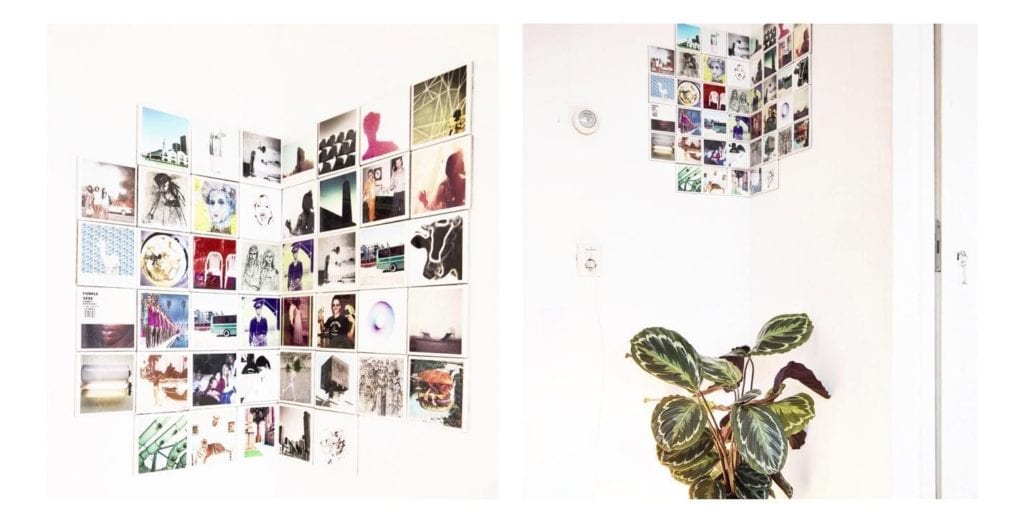
How about you add a little contemporary look to your ordinary photo frames? Try printing your pictures on photo tiles.
Tiles are a fabulous way to get your space overflowing with photos. They are relatively less expensive and if used in an innovative way, can really boost the elegance and visuals of your place. They’re easy to stick anywhere and everywhere.
Plus point: photo tiles can even act as the ideal gifts for occasions like weddings and celebrations etc. So get ready to embark on the journey to transform your place in a tiled sanctuary of your treasured pictures!
Make Your Own Wall Tiles of Photos and Amaze Everyone!
1. Collecting the things you require
We will explain each step in a comprehensive way so that you don’t end up being confused. Firstly, you must arrange and gather all the things you need:
- Papers
- Printer
- Glue
- Knife
- Paintbrush
- Tiles
- Pictures
- Sandpaper (optional)
2. Picture selection
The next phase is about selecting and editing whatever pictures you want to put on your walls. Visit your social media or your gallery and edit it if you want. Add some filters, alter the brightness, crop if you feel like removing excess area, whatever you want.
Remember, you’re the boss. Just make sure your pictures are all cropped square-shaped. Furthermore, your picture should be sized according to the dimensions of the tiles you’ve selected. If you want to get the right dimension for you, visit pops.com.
If you want to get the right dimension for you, visit pops.com. Check out 3D printed art collection from PIA Gallery for the very best in unique or custom, handmade pieces from our art & collectibles shops. 3D printed objects are changing lives all over the world in wonderfully different ways. Find Mathematical Art, Memes, Sculptures, Other and much more.
3. Printing time
Now, you need to get your pictures printed by effective laser printers and keep them carefully. This is to ensure that their colors don’t wash away. Printing the photos on tissue paper is very effective. All you have to do it attach the tissue in the middle of your printing paper.
A tip: avoid using a normal tape though as it will melt in laser printers.
Don’t worry it’s fine even if you wish to use something other than a tissue. Normal printing papers with a slight old fading appearance have their own charm too.
Sure, if you’re one of those who love taking a fancy to another level, you can even use the photo papers- fancy with a hint of your distinct touch. Not a bad combination at all, we’d reckon!
4. Glue-it-tight to make it right
You now move forward to sticking the pictures on paper. We suggest that you use decoupage glue for the photos to stick well while giving off a furnished look.
You can even use a heavy item like a book or a tile and press down on the photo tile in a soft way.
This is very efficient to remove any air bubbles that may appear. This can also assist you in rearrange the position of your pasted picture to fit the tile.
After this, it’s completely optional and up to you, but for an even more refined look, you can use sandpaper or a sanding block across the corners of the frame to cut the excess paper.
There you have it; following these simple steps will have you create aesthetic and creative photo tiles.
Now, you can either have the tiles put in frames or just stuck to a piece of board and hung on your walls.
The best part, because you are the one who made them, you are sure to feel pride and happiness for this accomplishment. After all, what’s a feeling greater than knowing that it’s you who decorated your space exactly the way you planned to?
Amazing Ways to Showcase your Pictures
It’s not just photo tiles, you can use numerous artistic ways. Some of them are so easy yet you’d have never thought about before! If you’re a vanilla lover who strongly believes in simplicity being the best policy, you can make a photo wall. It can have multiple aligned identical frames.
Besides this, you can add magnets at the pack of your frames or pictures and attach them in your kitchen, on the refrigerators, etc. There are numerous mind-blowing ways you can use pictures as awe-striking wall decorations. You are the master of your space and what you like is what matters the most in the end.
 Imagup General Magazine 2024
